There is nothing like the peace, rest, relaxation, and adventure of a vacation, but traveling with diabetes can be intimidating or stressful when thinking about packing all the necessary supplies, being prepared for a variety of situations that may come your way, and being far away from your diabetes care team in case of an emergency. When I first started my job, I knew I was going to be traveling fairly often which made me a bit nervous in terms of managing diabetes, but it was also exciting as it was one of the reasons I took the job. Over the past few years of taking trips about 1-3 times a month (before COVID), I developed my own packing system that I have down pat and thought I would share with you all my tips, tricks, and lessons learned over the years of not only work trips, but fun trips both domestic and international as well. Hope you are ready for a lot of information so let’s get started!
***The information in this post is not meant to replace a doctor and/or medical care team’s guidance on how you should handle and manage your diabetes when you travel. This is purely based on my own personal experiences and opinion. Always consult with your doctor and diabetes care team on what is best for your diabetes management before traveling.


Step 1: How long are you going to be gone?
The length of time you are going to be away from home will determine the amount of supplies you need to pack and to what extent of supplies will be needed. Here is a simple “calculation” I think about when starting to plan how much supplies I will need to pack for my trip:

My basic rule of thumb that I follow is that whatever number of site changes and amount of insulin I calculate I will need, I then pack double that amount. The reason I pack twice the amount of supplies is to be prepared for whatever circumstances that could come my way such as getting delayed a day, two, or three where I’m gone longer than expected or in case of pump failures, errors, or insulin going bad. You can’t be too prepared! You will enjoy your trip much more if you have the peace of mind that you have plenty of supplies available and can reduce the stress of the mental gymnastics of the “what if’s” that could occur to more fully enjoy your time away!
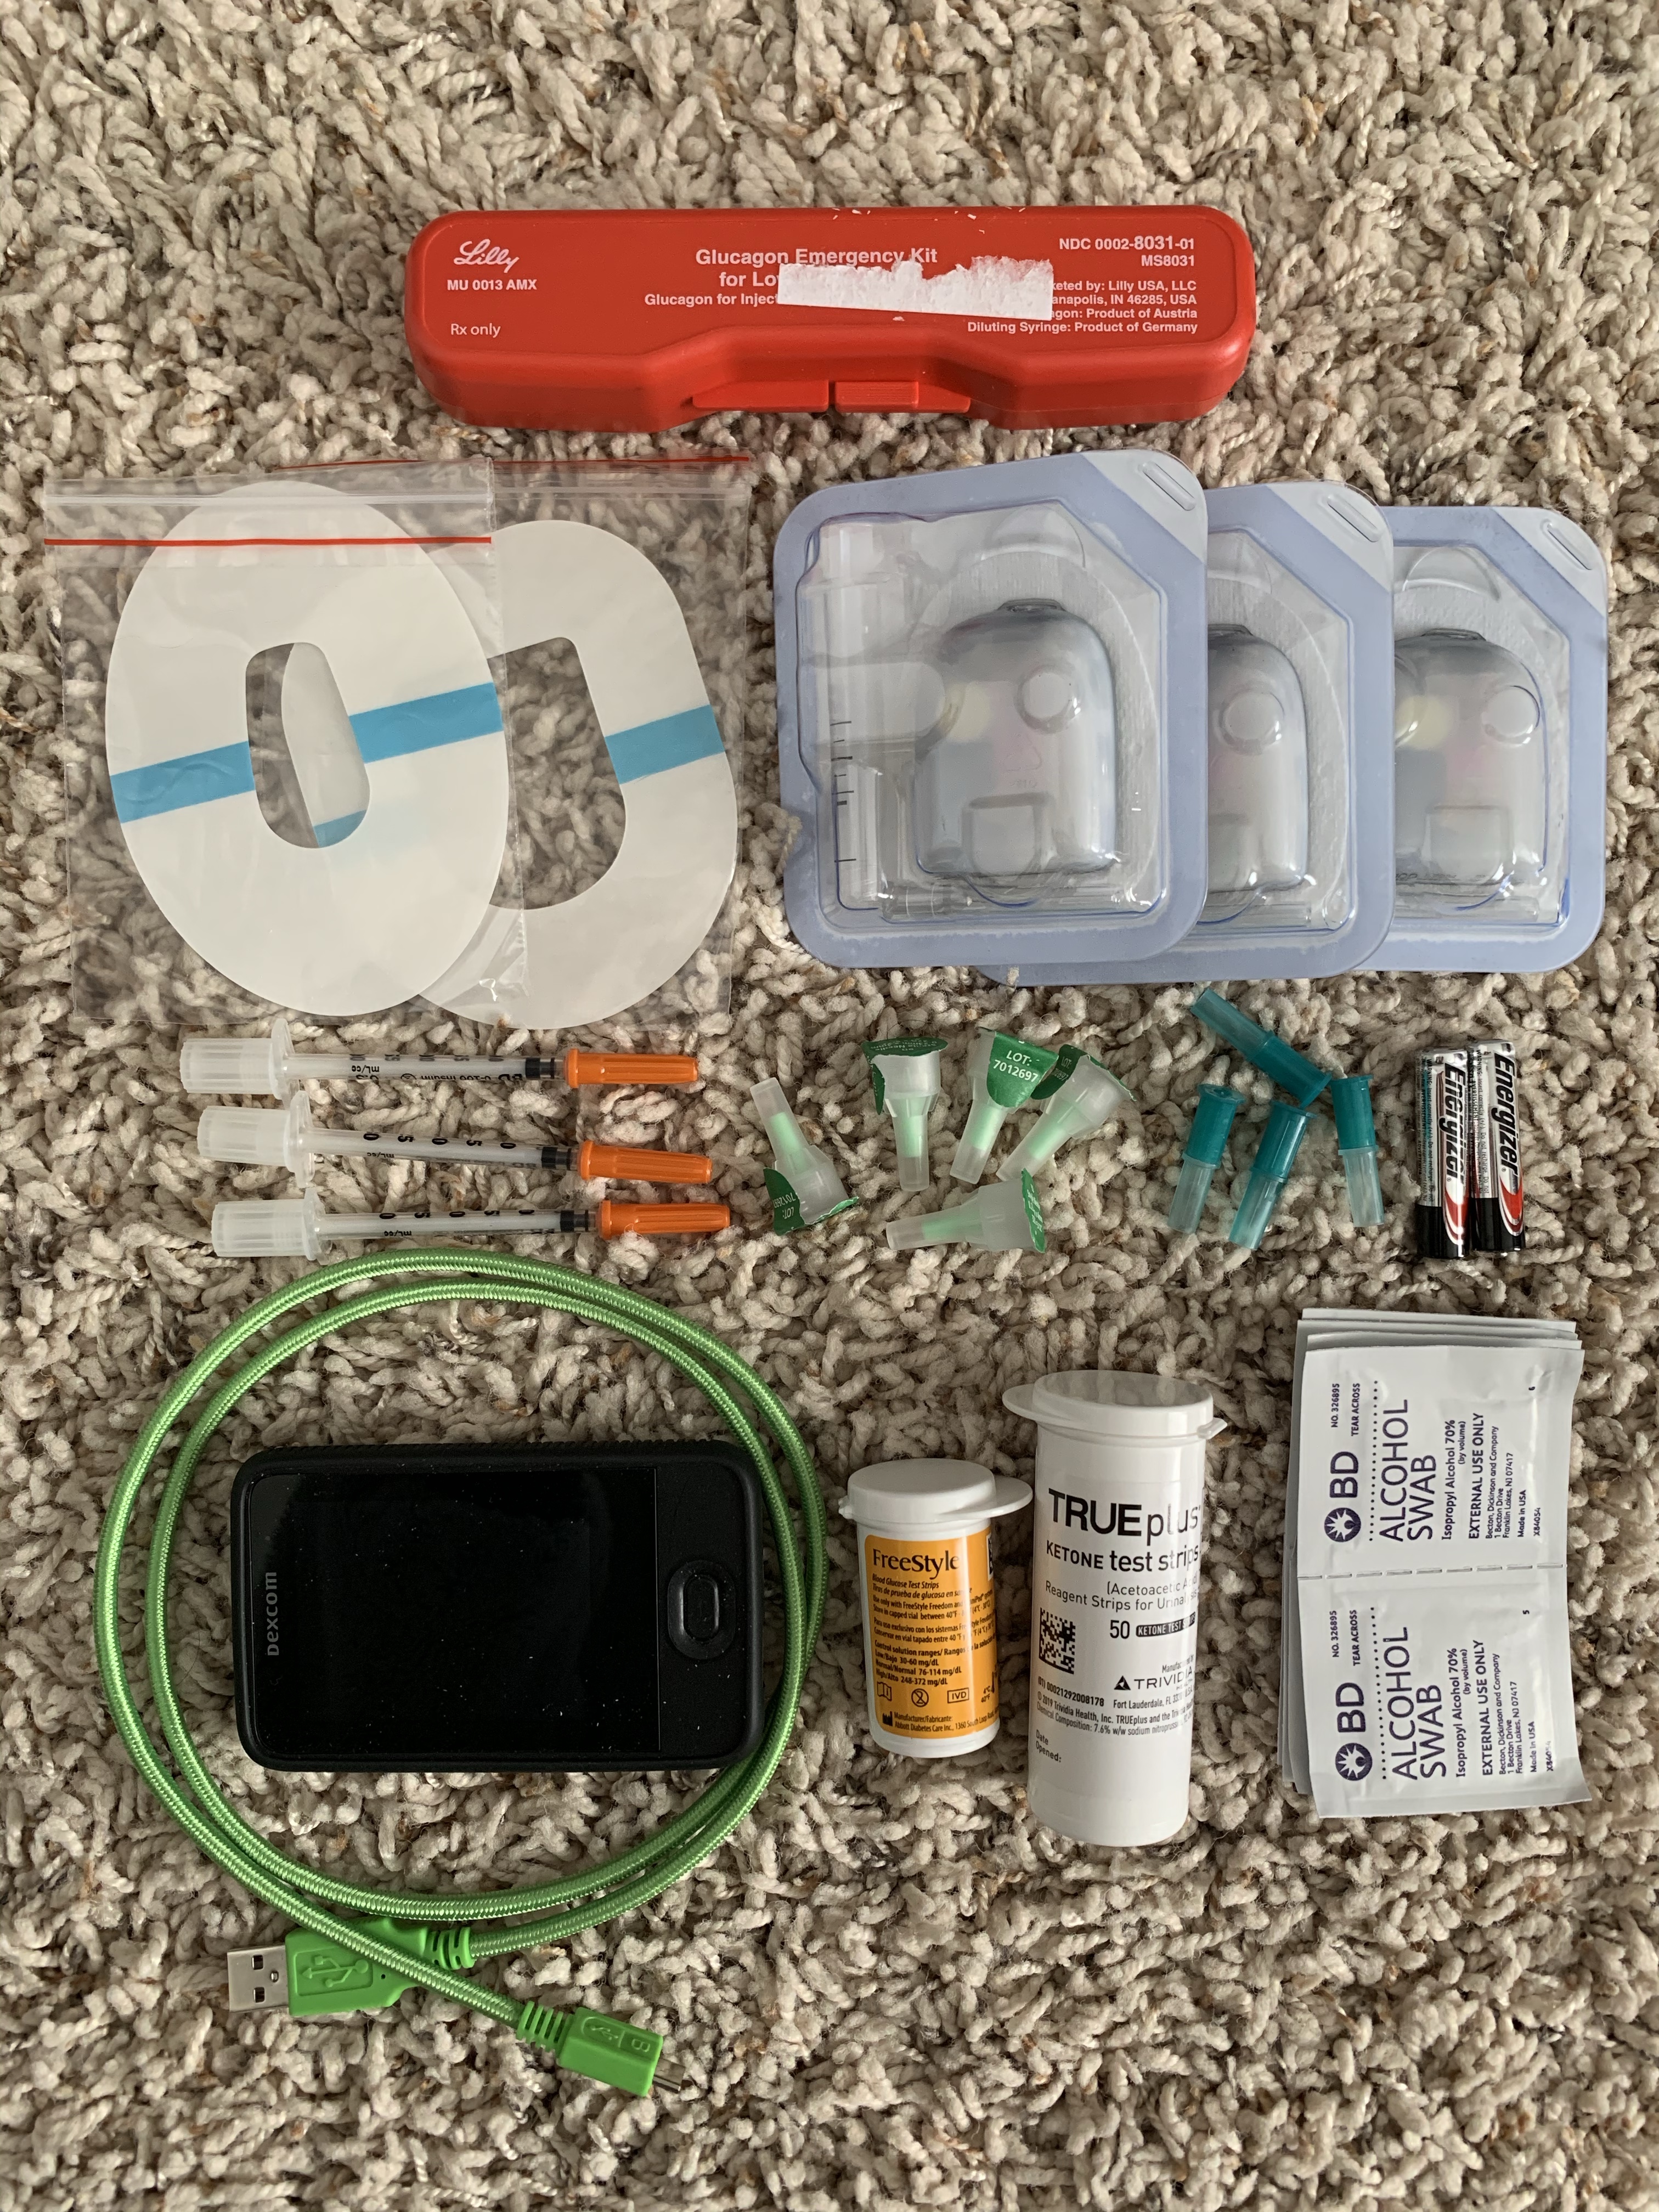
The following lists the supplies I pack based on length of time I will be gone. Since I use an insulin pump (Omnipod) and CGM (Dexcom), my preparation includes those items whereas someone taking multiple daily injections (MDI) will have a bit different packing list but same principles can still apply.
3-4 Day Trip:
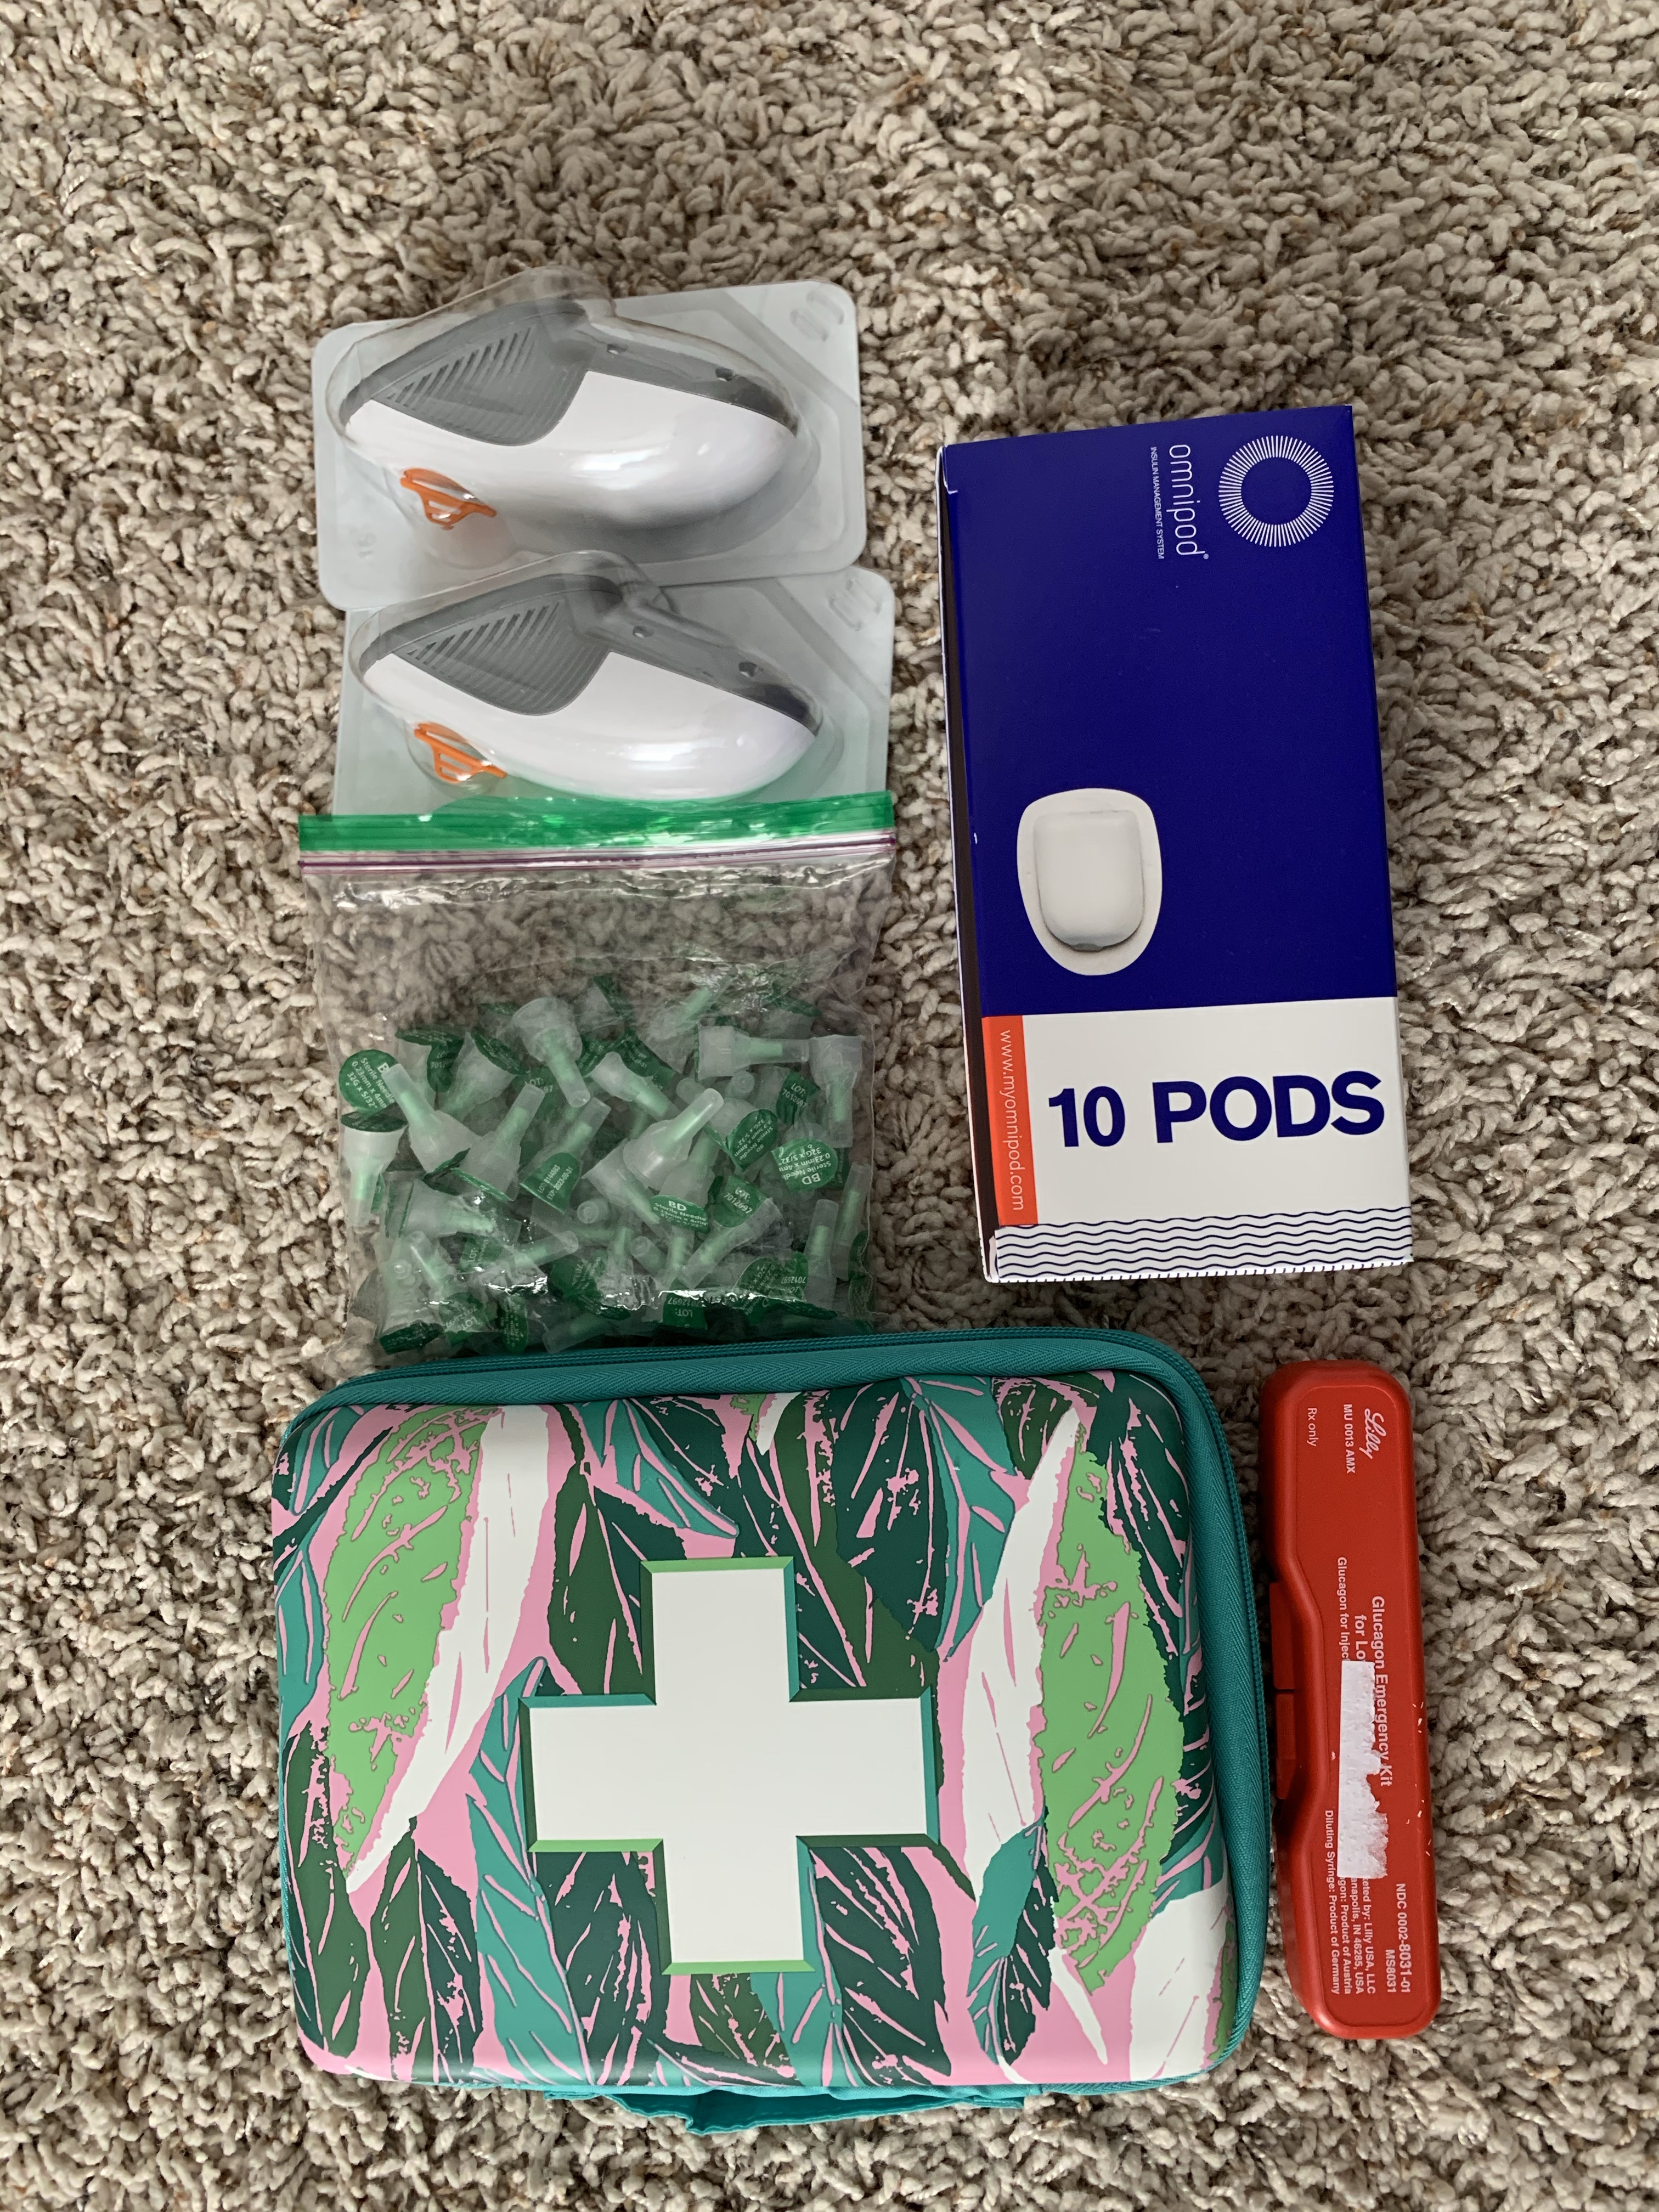
- Pump supplies for number of site changes plus 2 extra. A 3-4 day trip would just be one site change and my normal principle of double the supplies would only be one extra so like to have another extra in case of an Omnipod failure.
- Insulin for the number of pump site changes, plus the 2 extras, and still a bit more in case an injection is needed in an emergency.
- Syringes or insulin pen plus pen needles. This in case an injection is needed to correct an extremely high blood sugar or a plan B if insulin pump fails. Always have a plan B in case your primary method of insulin administration fails! For those on a pump, it can be having a back up of being able to do injections. For those on MDI, it can be having extra insulin in case a vial or pen of insulin spoils or breaks. For a shorter 3-4 day trip, I usually just a take a few syringes that I could use my vial of insulin that I have for filling my pump.
- CGM supplies if you will need to change your CGM site while traveling plus an extra. If I won’t need to change my CGM site while traveling, then I just take the extra in case the one I’m wearing fails. I use Dexcom which lasts for 10 days so usually don’t need to change this during a 3-4 day trip unless that 10th day falls during my trip.
- Glucometer plus test strips, lancets, and lancing device (finger poker). Even if using a CGM, you need to have a back up in case it fails and also a way to validate or calibrate since a CGM may not always be on point with true blood sugar.
- Alcohol Swabs. Necessary to keep things cleanly during pump site changes and/or injections.
- Ketone test strips or blood ketone meter. Traveling tends to make my blood sugars run higher due to being out of routine, eating out at restaurants, stress/adrenaline, change in climate, etc. so it’s nice to have a quick way to gauge ketones if blood sugars are running higher and also if ketones reach a point where you need to seek medical attention.
- CGM Receiver/Reader. I use my phone for my Dexcom readings, but I pack the receiver to take with me in case I can’t use my phone for some reason for readings.
- Extra batteries for all needed devices.
- Charging cords for any devices.
- Adhesive tapes for pump or CGM sites in case they come loose.
- Glucose tabs. A non-perishable, non gel or liquid (for air travel) to have on hand in case of a low blood sugar that is easy to transport and fast acting.
- Glucagon. In case of an emergency of a very low blood sugar. Make sure someone you are traveling with knows you have diabetes, knows where your glucagon is, and knows how to use it.
1 Week or Longer Trip:
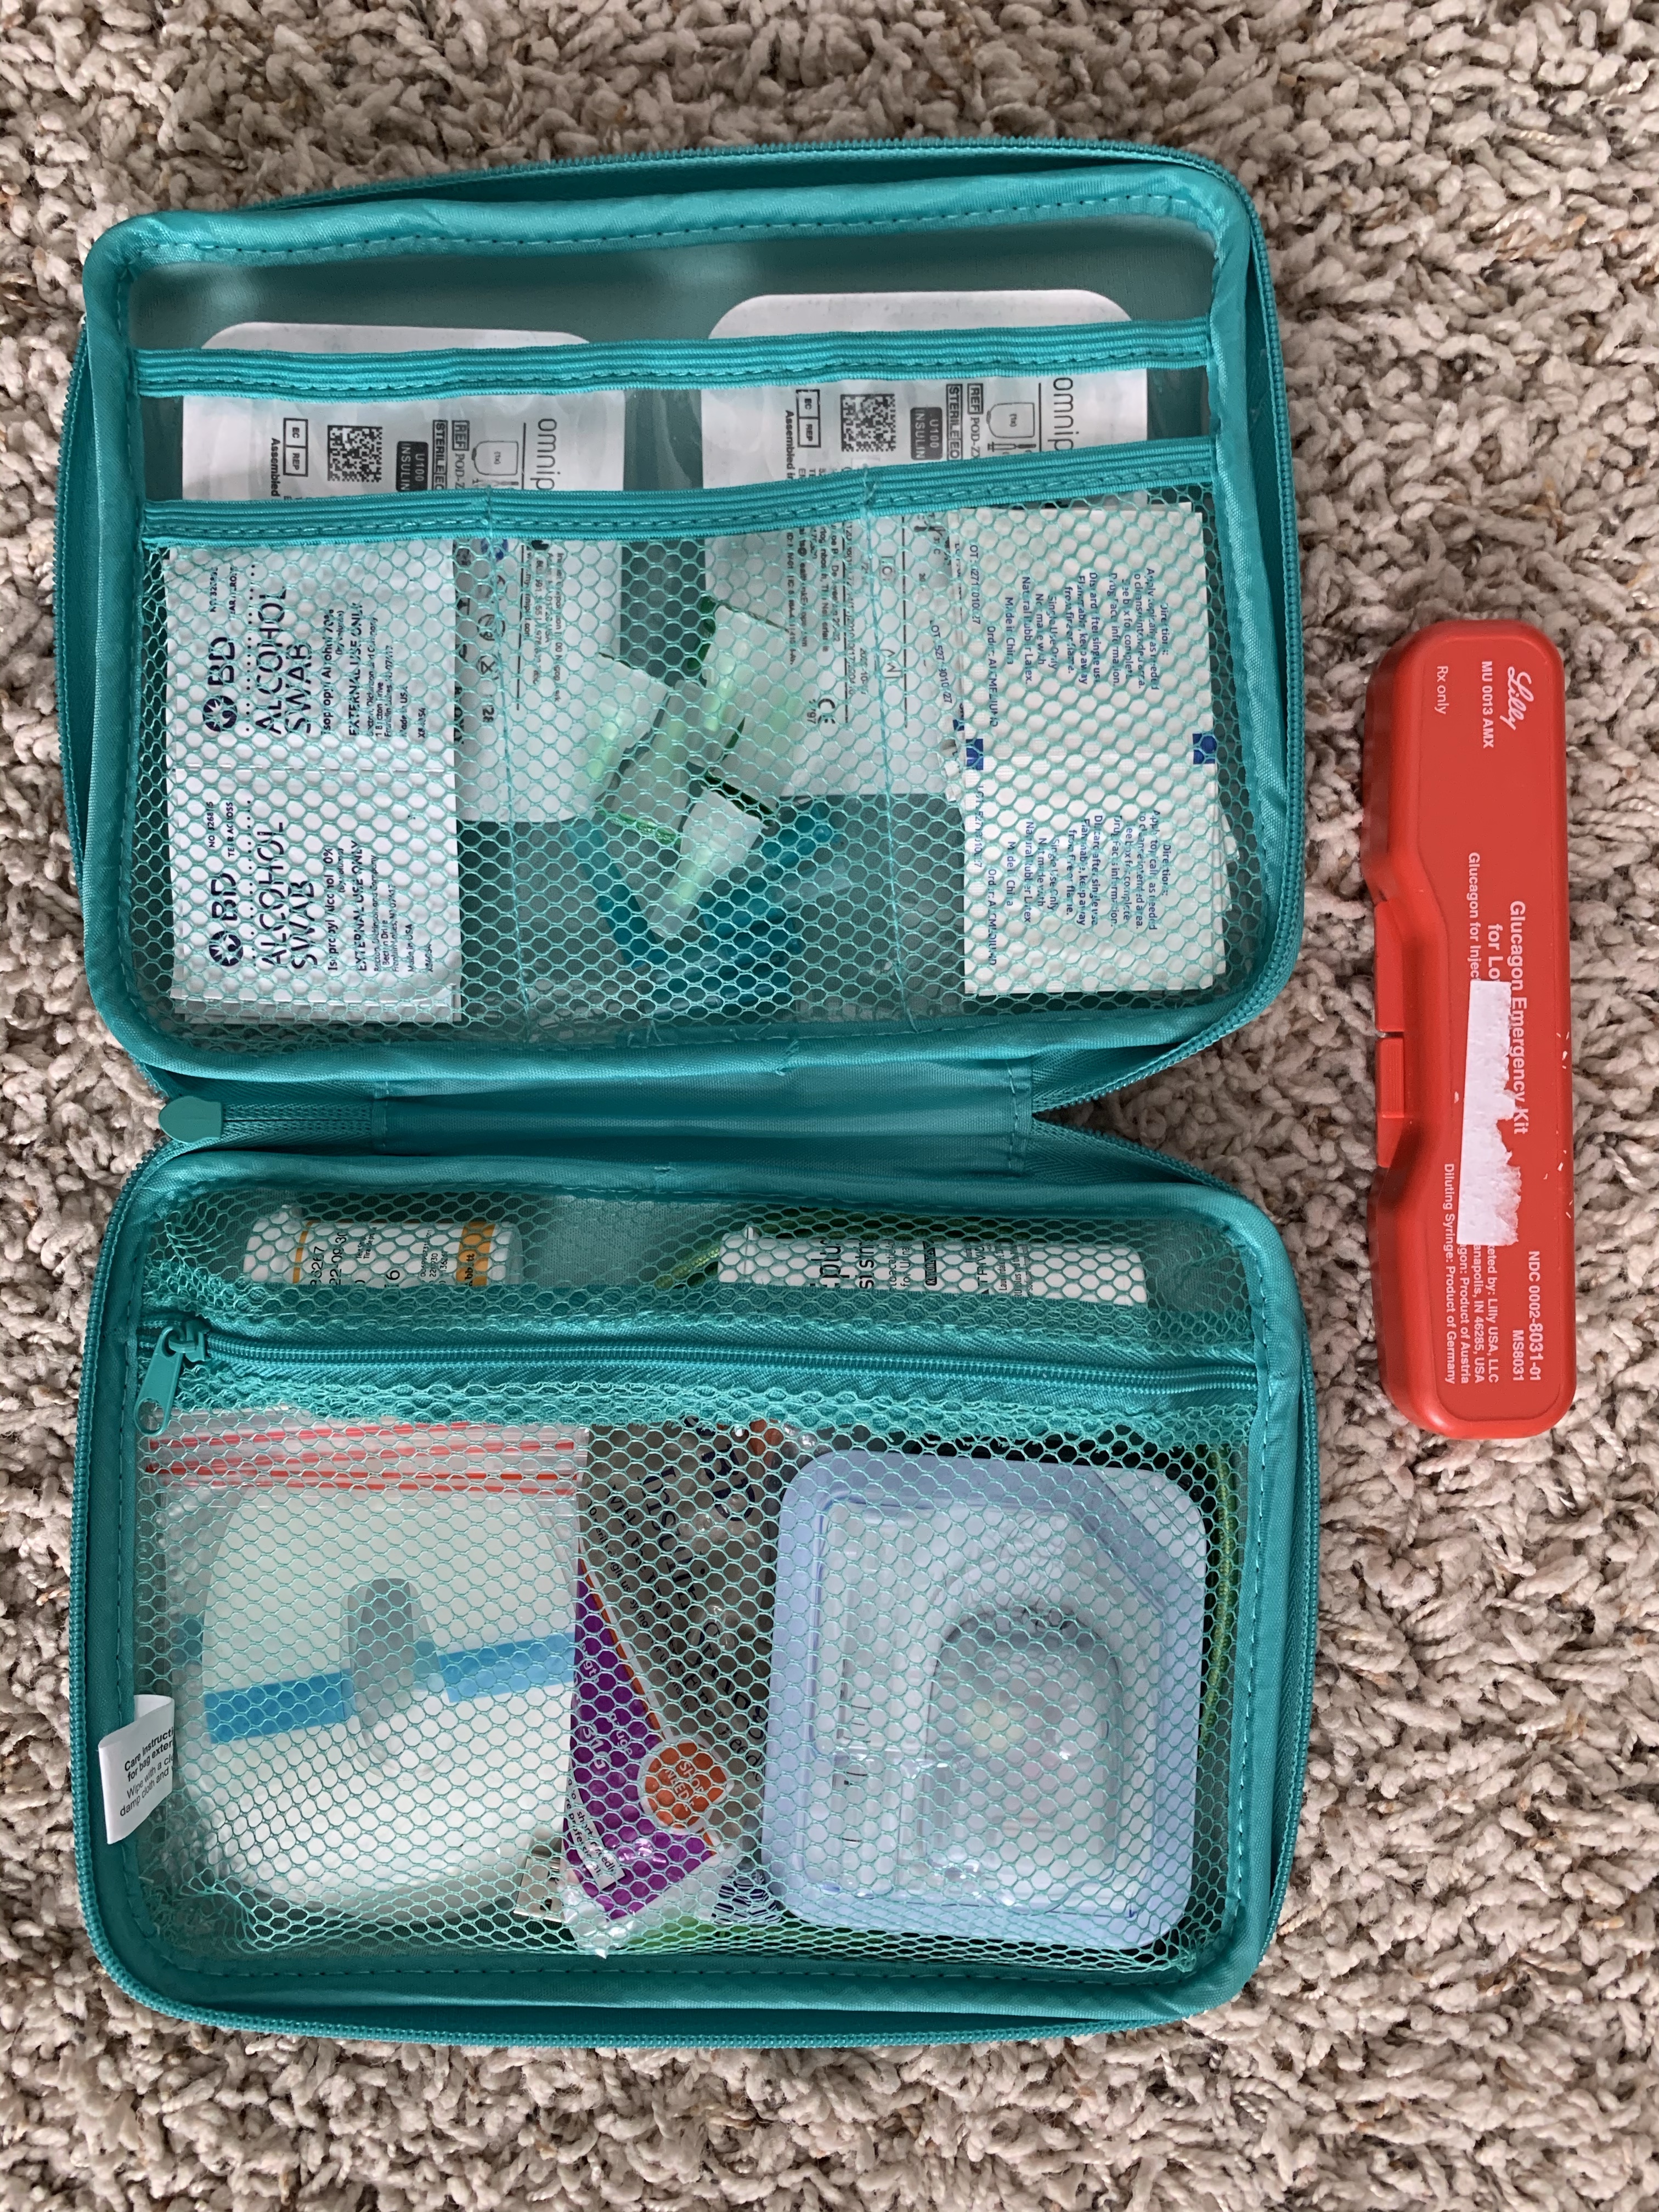
For trips longer in duration, I pack the exact same list as above, but just more in keeping with the “pack twice as much” rule. The longer you are away, the more increased the odds are of having a faulty site, pump failure, ketones, spoiled insulin, etc. so it’s important to pack extra, extra, extra!
Once I hit the 1 week or longer duration for a trip, I will also pack a long acting insulin just in case I have complete pump failure and would have to switch over to doing multiple daily injections. I usually ask my endocrinologist for sample insulin pens of a short and long acting insulin to have on hand in case of an emergency. This avoids the hassle of needing to get a prescription filled or dealing with insurance when you are just needing enough insulin to last a week or two.
I’ve put all these items into a packing checklist that you may find helpful when you go on your next trip! Click below to download.
Step 2: Where are you going?
If you are not leaving the country (USA) during your trip, you have a little more leniency in resources available if you would happen to forget, lose, or need supplies. If your glucometer breaks, need test strips, ketone strips, or along those lines, a near by pharmacy would have those items for purchase without needing a prescription. However, in terms of insulin and pump supplies, those are not something you can just run out and purchase so it’s important to have plenty packed with you. If necessary, I do believe you could have your doctor transfer a prescription to a pharmacy near you.
If you are traveling internationally, pack with the mindset that you need to have everything you need on you with no opportunity to purchase supplies else where. While pharmacies may have supplies available for purchase, it should not be something to rely on. With traveling internationally, I always pack following my “1 week or longer” rules even if I’m just going for a few days. I make sure to have my back up of short and long acting insulin pens and lots of extra supplies. On my most recent trip to Mexico, I not only packed twice as much supplies as I would need, but also packed an extra 2 weeks of supplies on the chance that would get quarantined due to COVID. Traveling during a pandemic calls for packing even more supplies than you think necessary on the chance you would have to quarantine somewhere other than home.
No matter where you are going, talk with your doctor and diabetes care team for the best plan of action for accessing supplies and diabetes management strategies while traveling. Whatever you can do to provide peace of mind while traveling, like knowing your plans of action, will make your trip less stressful and more enjoyable.
Another piece to consider with your travel destination is the climate. Outside temperatures, altitude, and sunburn can all potentially impact blood sugar so you should consider the weather and potential activities you will be doing to plan for blood sugar impacts and management strategies. For example, one thing I like about the Omnipod is that it is waterproof so when travel to a tropical/beach destination where I am spending a lot of time in the water, I don’t have to disconnect my pump. However, it doesn’t seem to do well when receives a lot of water exposure plus direct sun as I usually always get at least one pod failure when I’m on these types of vacations. On my most recent beach trip, I decided to fully switch to MDI and take a break from my pump as I wanted to enjoy being in the water and sun without worrying about adhesive coming loose or pod failures. When I’m traveling for work, my normal management strategy of using my insulin pump is just fine as my activities aren’t that different from when I’m at home. Again, you should discuss with your doctor the best management strategy based on the type of trip you are taking for what will work best for you, but should take into account the type of destination you are going to and the activities you will do there for planning out what you will need for the trip.
Step 3: Packing
I pack up all my supplies in a medical kit that I got at Target about 2 years ago. Here it is online, but it should be available in stores as well. I really like it because it fits everything I need without being large and has a firm outer covering to keep things from getting smashed (left and middle picture below). There are tons of travel kits out there to find one that you like best. If I’m packing for a longer trip (1 week or longer), all my supplies don’t fit in the kit and I’ll end up using plastic baggies, cosmetic bags, or just using the boxes the supplies come in (far right picture below) for the additional supplies. For me personally, I would rather have a couple smaller bags rather than one large bag for all my supplies as I find it easier for packing and then have options once I get to my destination if I want to throw a few things in one of the smaller bags to take with me for the day or put in my beach bag. If you prefer to have everything together in one big bag, perhaps pack a smaller bag too so you have the option to downsize in carrying supplies around once you get to your destination.

Now, for the most important part, packing and transporting insulin. Some travel bags come with insulated pockets where insulin can be stored in the same bag with all your other supplies. I prefer to keep my insulin separate and like using this Frio cooling bag. They come in various sizes and colors and can keep your insulin cool for up to 48 hours! The one I have pictured is the large wallet size. Check them out at the link attached to Frio above. All you do is soak the inner black bag in water to activate the beads and then the pouch stays cold.
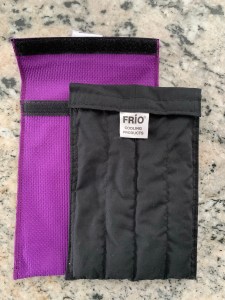
Even if I’m transporting insulin for only a few hours and don’t feel the need to activate the beads, I will still carry my insulin in this pouch as it provides protection and makes it easier to keep track of my insulin. I also then have the ability to activate the beads for the cold pack if the situation arises. Again, you can never be too prepared! I personally have not used these (yet), but they also make protective silicone sleeves to go around insulin vials that add a layer of protection when carrying your insulin around. This could be another option to use when traveling to make sure your insulin is protected.
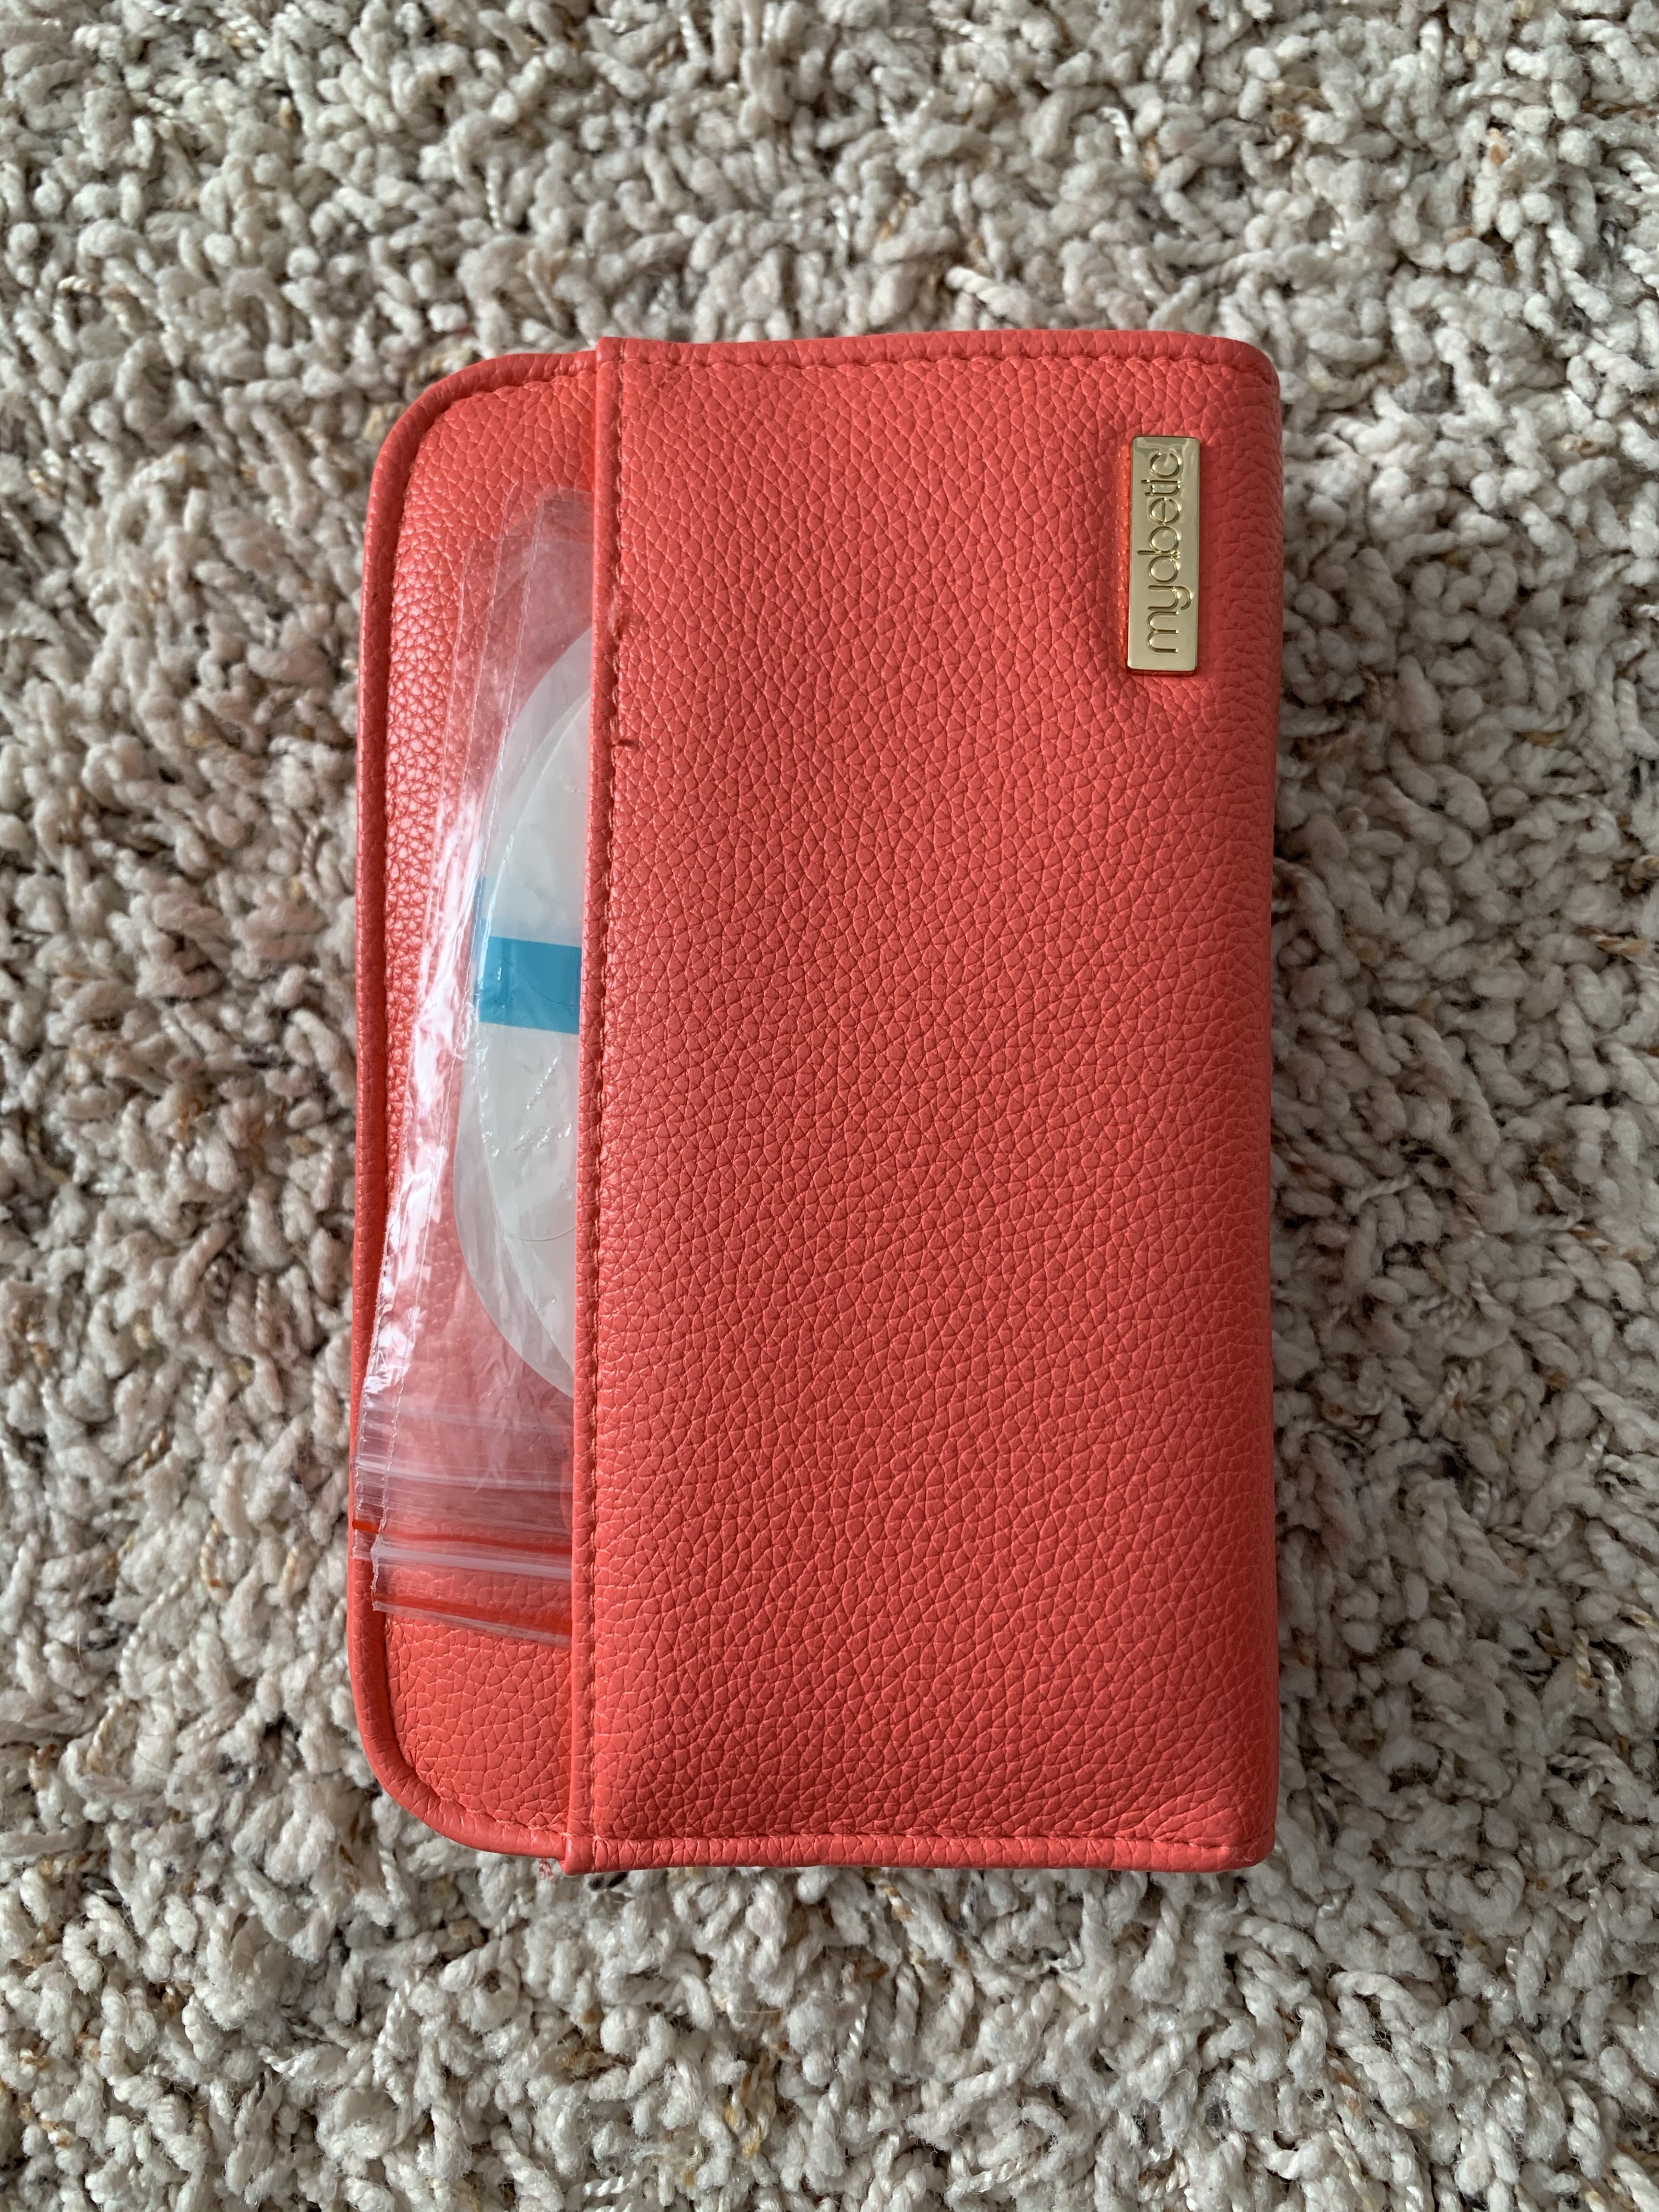
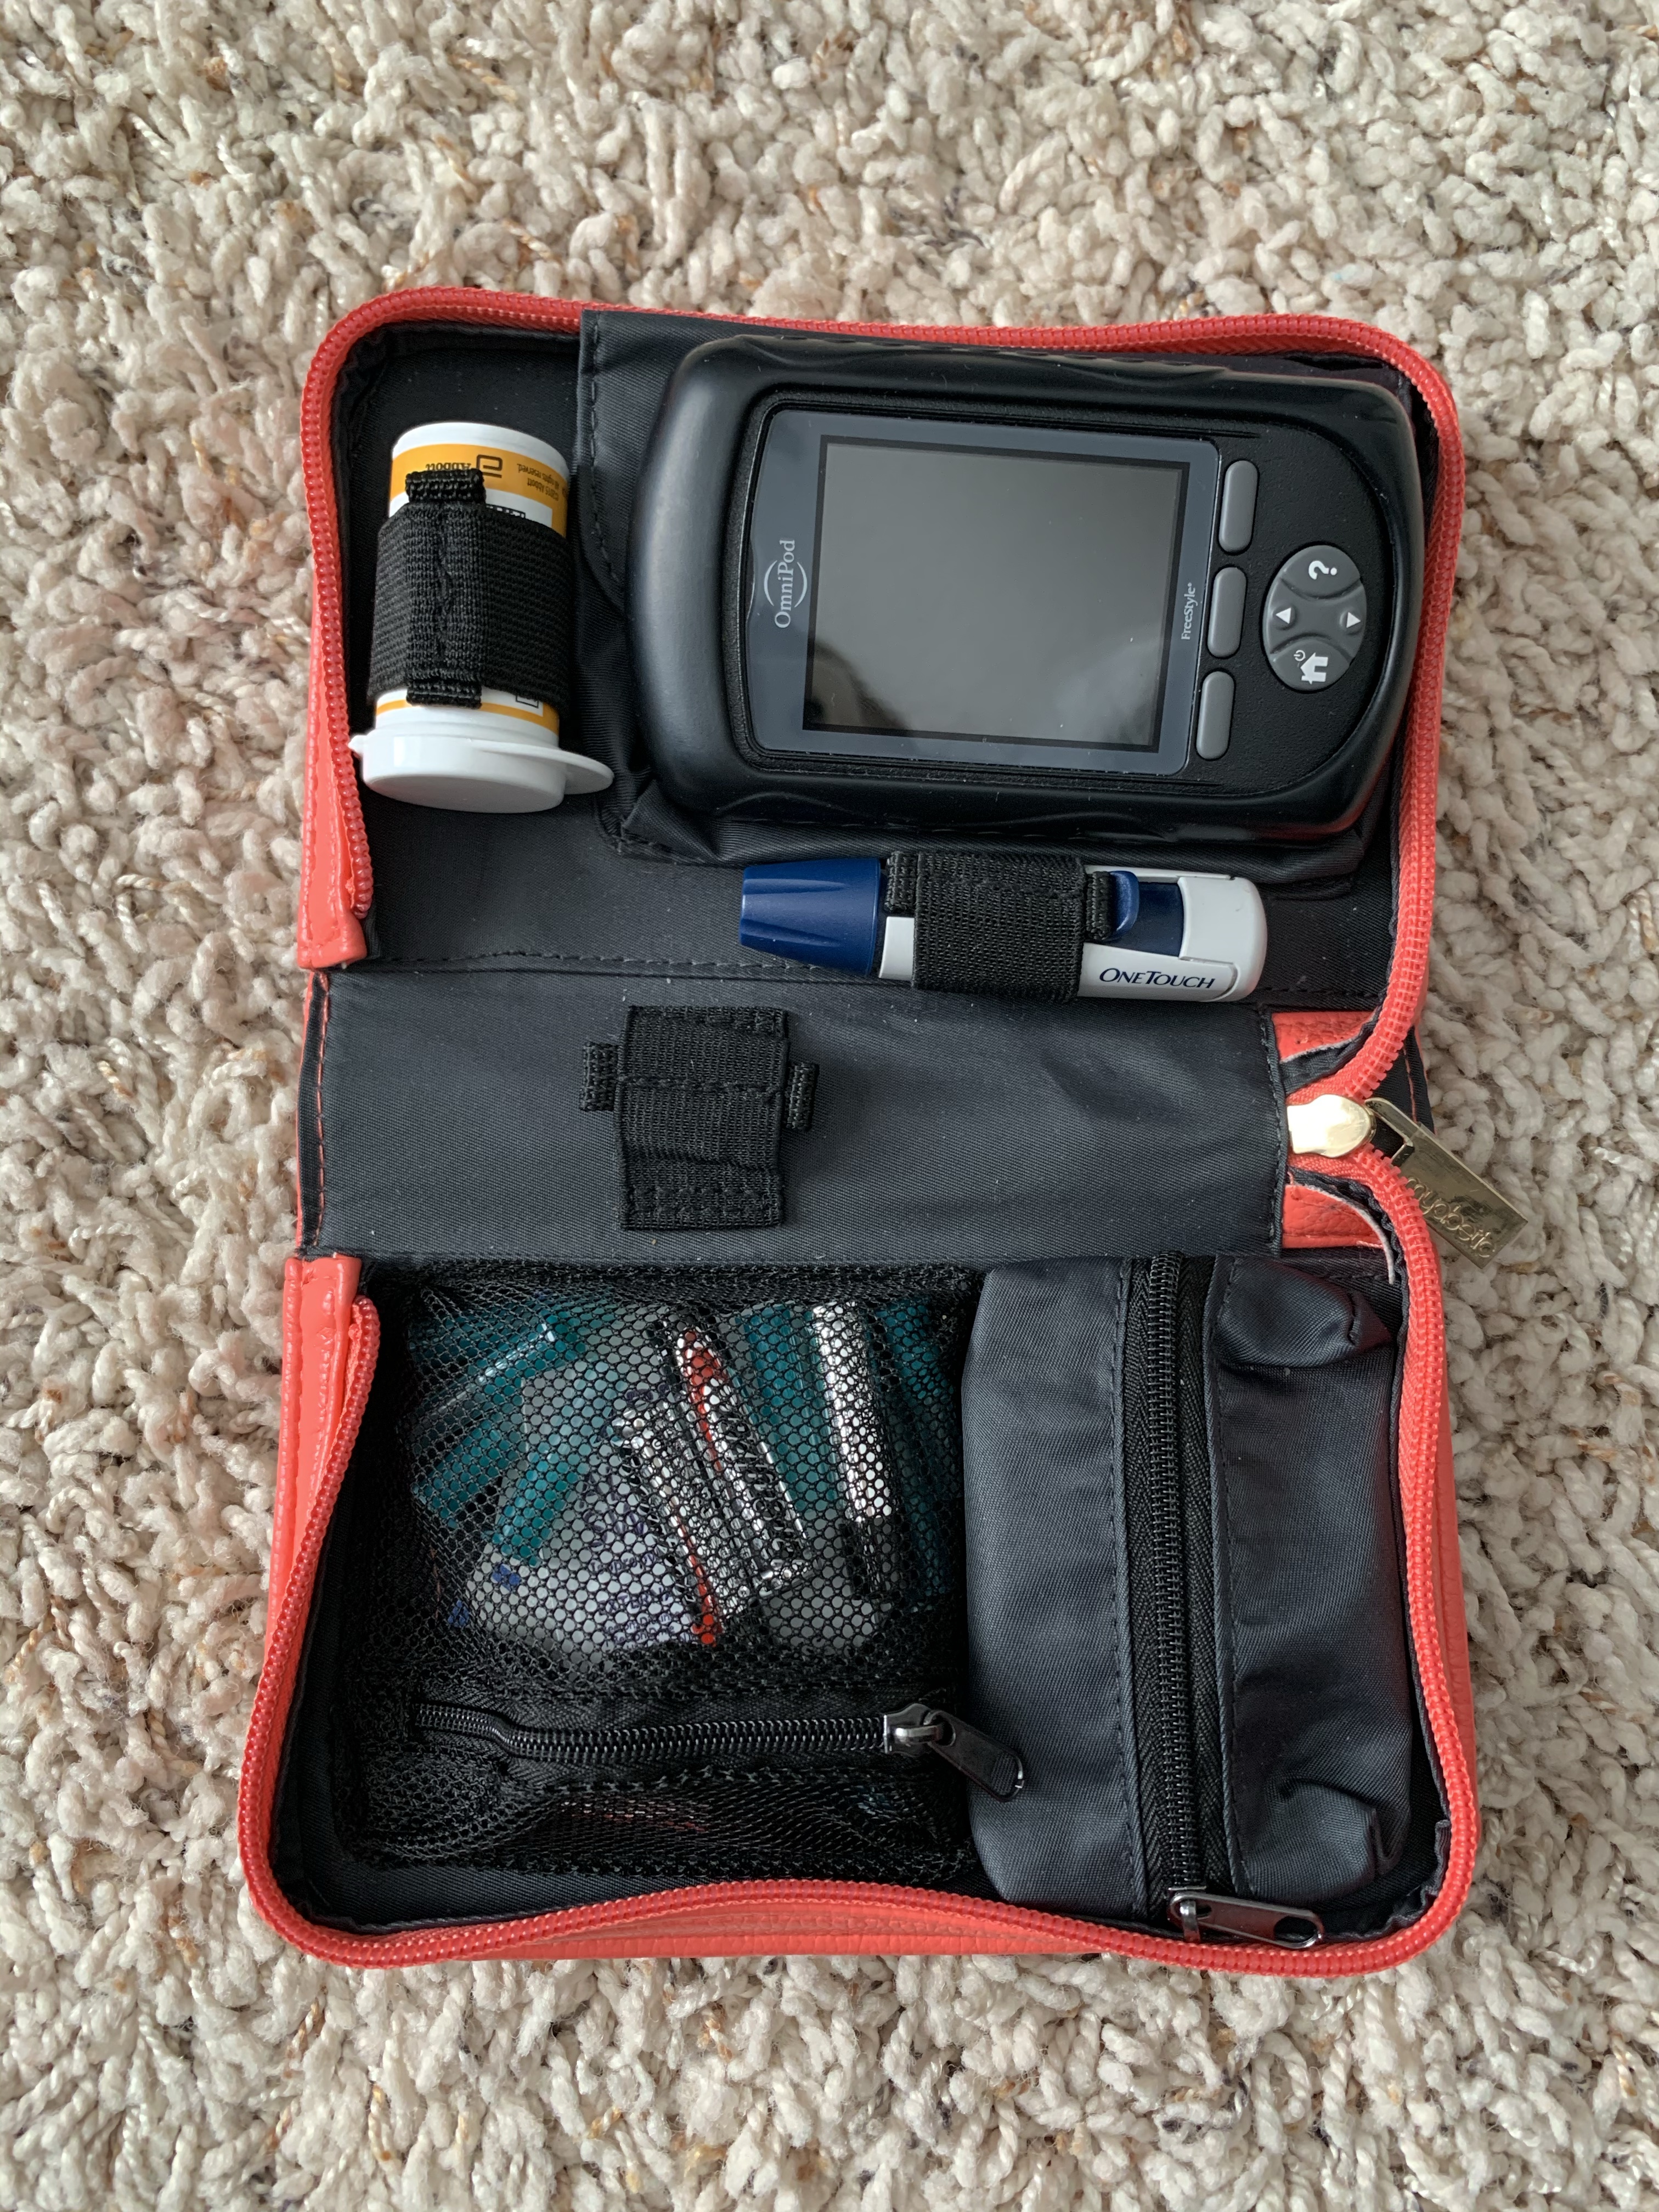
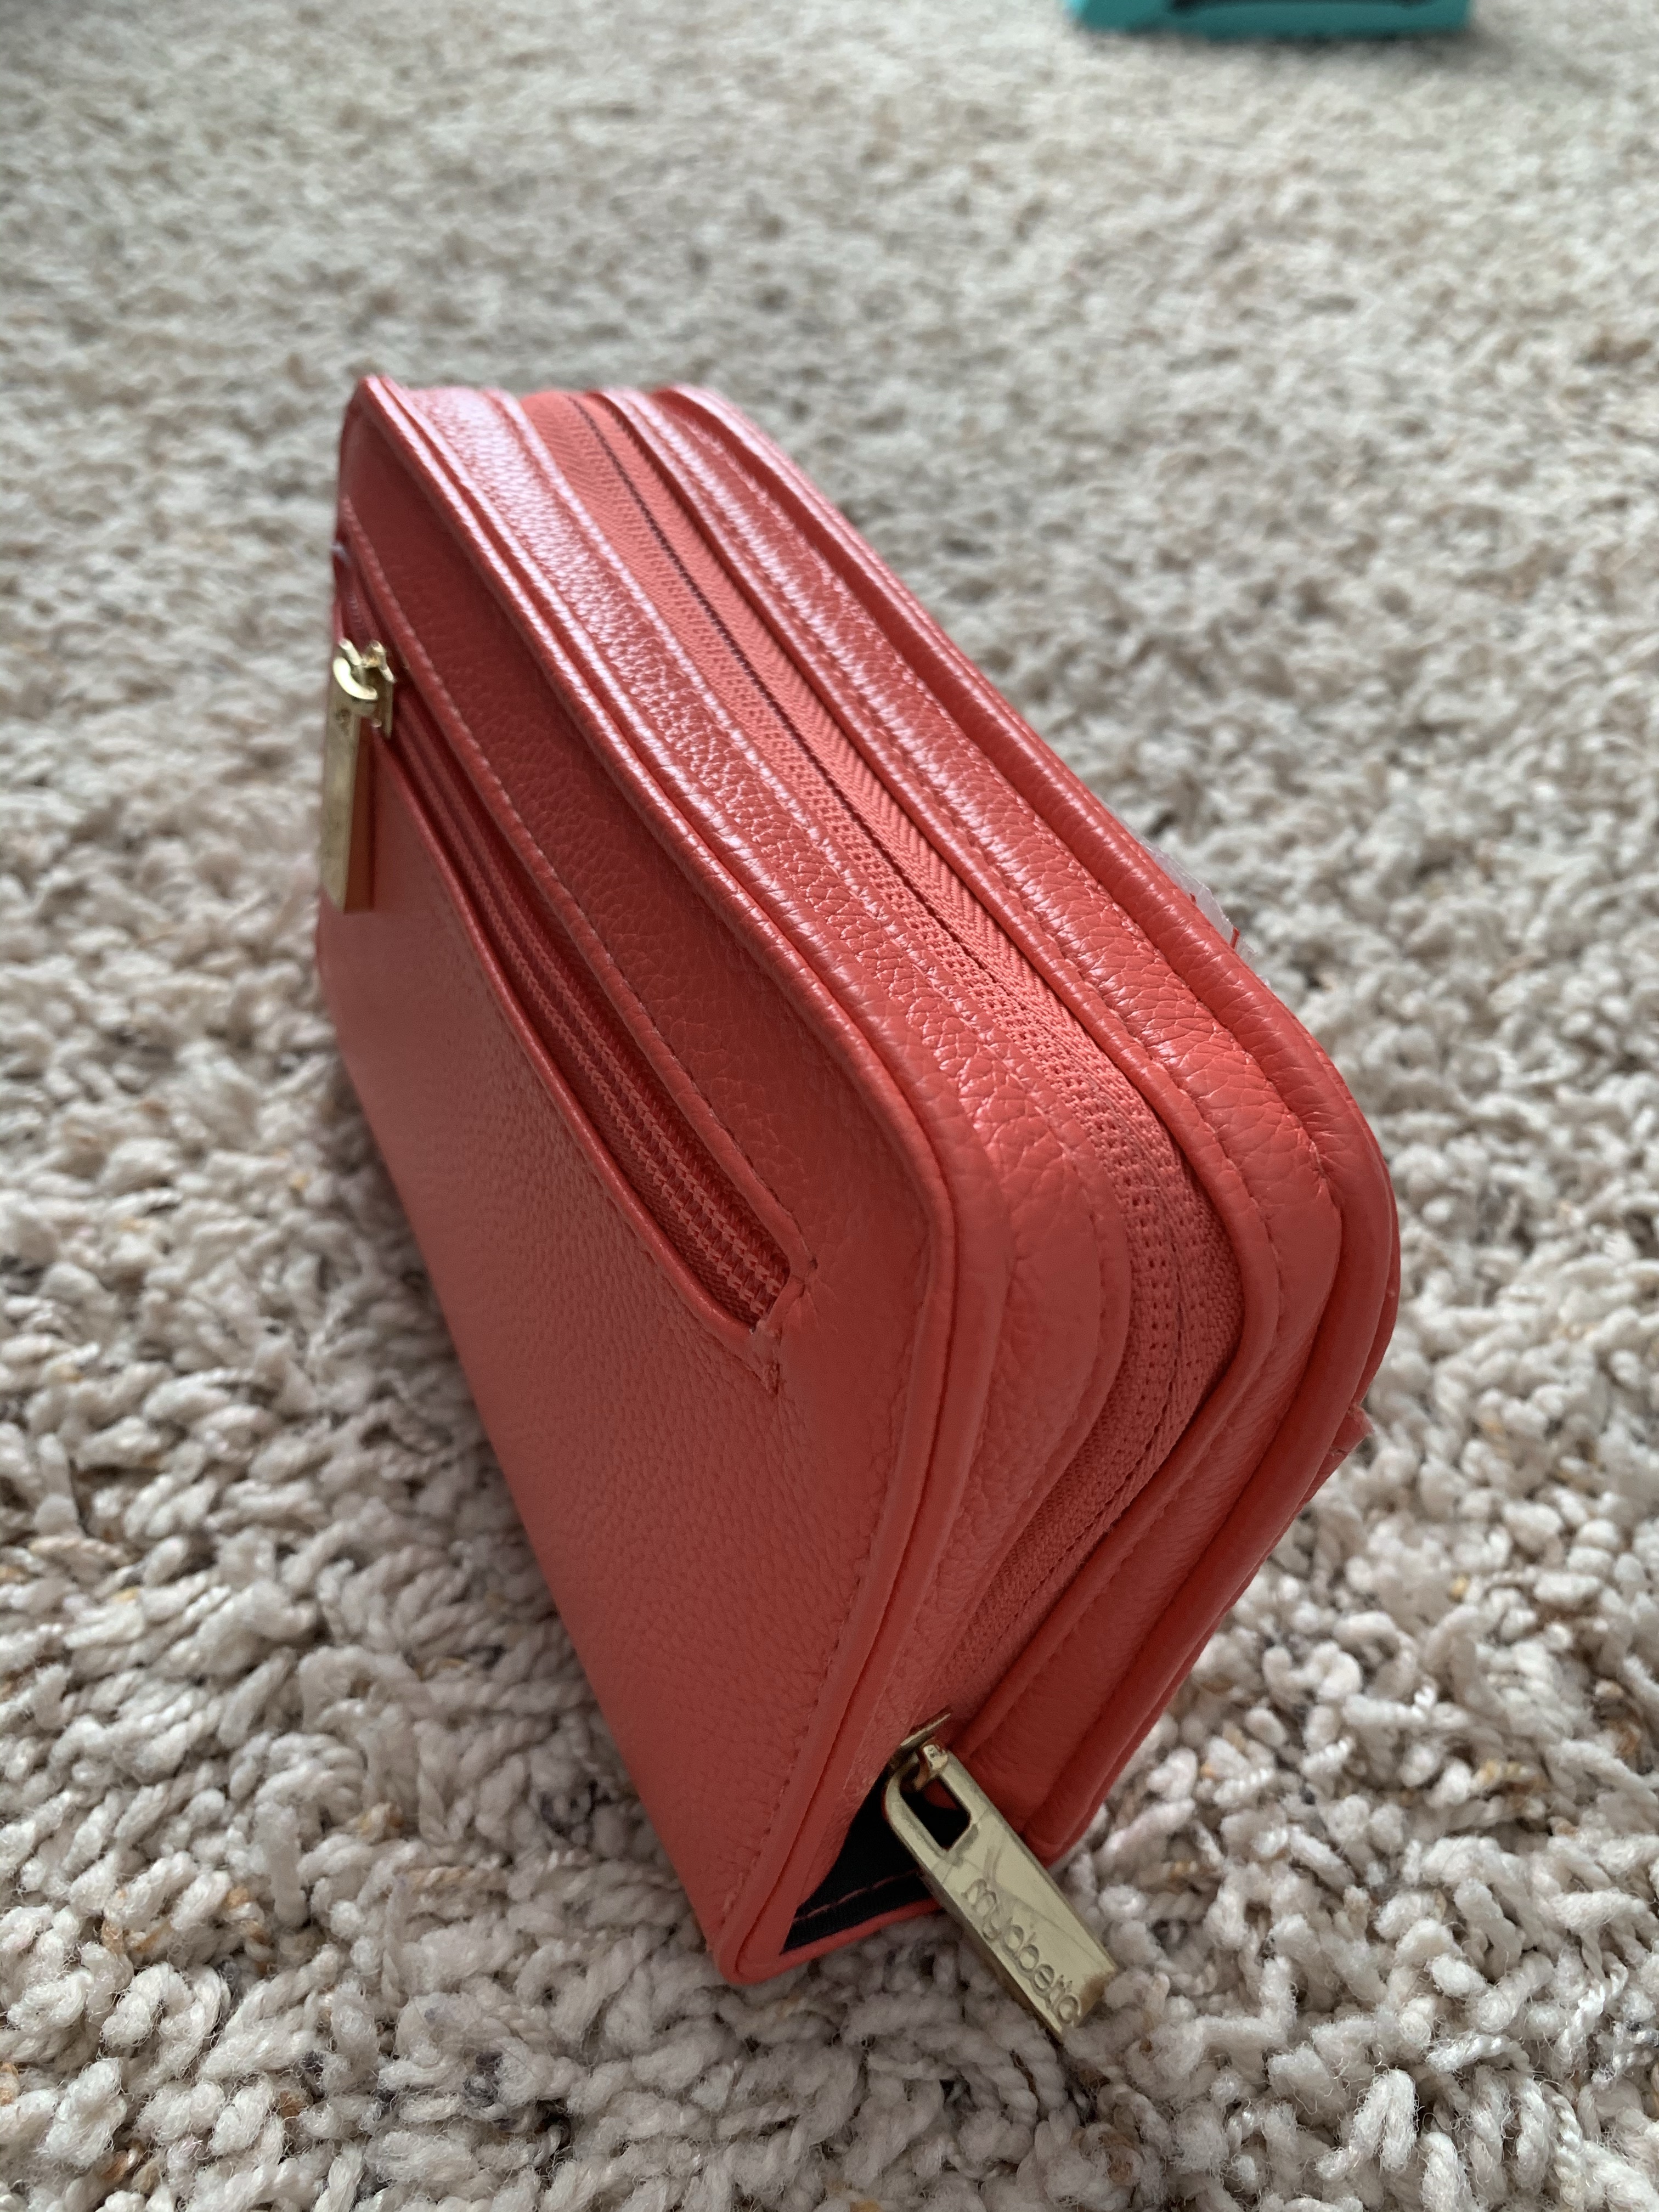
In addition to taking all the supplies I’ve listed so far, I also pack my “every day” kit. This is also the kit that I put in my purse when I’m leaving the house. It stores my PDM for my omnipod which also serves as my glucometer, my blood sugar testing supplies, extra batteries, and adhesive patches. This is the Banting Diabetes Wallet from Myabetic. I like how this wallet has a place for all my every day items and even a little trash pouch for used test strips. It also has a stylish look compared to other diabetes supply cases and comes in a variety of colors. Check out this wallet and other diabetes supply bags at the link attached to Myabetic.
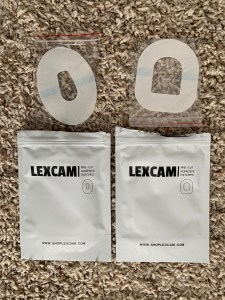
Pictured to the left are the adhesive patches I like to use that I purchased off Amazon. I’m not really into the colorful and patterned patches, and these are just a clear film, but I like that they are thin and stick really well. I wear these often during the summer over my Omnipod or Dexcom when I will be swimming or in water and have never had an issue with them becoming unstuck. Check them out on the link attached to Amazon above.

Pictured on the right are the glucose tabs I like the most. I get them from Walgreens and prefer the raspberry flavor to other ones I’ve tried. I also like the travel size tube (holds 10 tabs) as it is easy to stash these in purses or bags and take on the go. I will usually travel with the small tube and a full size container to be able to refill the small tube. Once I get to my hotel, I will keep the full size container on my night stand for easy access if have a nighttime low so I’m not rummaging around in an unfamiliar environment or looking through my bag/suitcase for them.
Outside of diabetes specific supplies, you will also want to make sure you are packing items that will protect your skin depending on the activities you will be doing. As listed above, sunburn can affect your blood sugar in addition to being bad for your skin, and also those with diabetes are more prone to skin infections and slow healing wounds. Be sure to pack plenty of sunscreen if doing outdoor activities, lotion to prevent dry and cracked skin, and antibiotic ointment and Band-Aids in case of cuts or scrapes.
Step 4: Before You Go
Now that all your supplies have been packed up, you will want to make sure you have any necessary phone numbers stored in your contact list, emergency contacts have been established, and the medical ID in your phone has been filled out. Consider wearing a medical ID if you will be traveling alone. MyID has some cool options that include sleeves you can put around a watch band.
I personally have not needed a doctor’s note regarding my medical devices when going through airport security, but this may be another item to get in advance of your trip for peace of mind in case you would be in a situation where it is needed. Also in preparation conversations with your doctor, make sure you know how to dose long acting insulin if an insulin pump is your source of insulin administration. If your pump fails and need to switch to injections, figuring out the amount of long acting insulin to take can be challenging as basal rates can vary throughout the day so let your doctor tell you what this amount should be.
If you will be traveling to a location where you do not speak the language, learn a few phrases in that language related to your diabetes. For example, learn how to say “I need help. I have type 1 diabetes” or “I use insulin” or “I’m allergic to X” or phrases along those lines so if something does happen, you have a way to communicate your health needs.
If you will be staying in a hotel, verify there is a refrigerator in your room. You can call ahead and request one saying it’s needed for medication and they will either make sure you are in a room that has one or move a mini refrigerator into your room. You may also want to make sure there is a safe in the hotel room. Diabetes supplies are expensive and may want to consider locking them away to avoid someone swiping them. I don’t usually lock my supplies away, but do keep them out of sight in my suitcase so they are not sitting out in plain view.
Last but not least (and maybe most important!), always, always, always keep all your supplies with you in your carry on if you will be flying! Do not put in your checked bag as there can be extreme temperature changes in the cabin under the plane where the bags are kept and you also don’t want to take the chance of being without your supplies if your bag gets lost. On most airlines, a medical bag does not count towards your 2 bag maximum of carry on items so you can have a designated bag for your supplies in addition to a suitcase and backpack or work bag. If you will be driving instead of flying, keep your supplies with you in the main cabin of the car where it is temperature controlled and not in the trunk. Always pack some snacks in the bag you will have with you in case of low blood sugar. I find it easiest to travel with non-perishable and non-liquid items like glucose tabs, trail mix, protein bars, or the snack size bags of cheez-its, gold fish, teddy grahams, etc. Those with diabetes are exempt from the “no liquids through security rule” for juices and gels. If you do want to fly with juices or gels, it would be good to have that doctor’s note for when going through security so they aren’t confiscated.
Step 5: On Your Way
If you are flying:
- If you have TSA Pre-Check:
- Getting TSA Pre-Check was one of the best decisions I ever made for travel. You do not have to take any of your supplies or snacks out of your bag and my pump and dexcom do not set off the metal detector so I literally just set my bags on the belt to go through the machine and walk through.
- If you don’t have TSA Pre-Check:
- You will need to take your liquids out of your bag which I include insulin in this category so I would take out the pouch my insulin is in and put it in a bin.
- Right before COVID, they had started where you need to take any food out of your bag as well so the snacks you are traveling with will most likely need to be taken out of your bag and put in a bin.
- Your other diabetes supplies can stay in your bag.
- When entering the machine where you have to put your hands up and it scans you (don’t know what the name of it is), the TSA agents will say to be sure your pockets are empty. I’ve had a few TSA agents tell me it looks like there is still something in my pocket, and I say it’s an insulin pump, and then they say ok and to continue on. I’ve had TSA agents tell me to take off my pager, fitbit, phone, you name it. A few have been very rude, but most have been understanding. If they keep questioning you, just keep repeating that it is your insulin pump, you cannot take it off, and it is attached to you.
- Your insulin pump will show up on the scan. My dexcom has not showed up on the scan yet, but not to say it couldn’t happen. They will then ask you to step aside and will want to test your hands. I’ve been told that this test is looking for explosive residue. They will ask you to either touch your pump or area around it and then wipe this piece of paper over your hands. That piece of paper goes into a machine for a few seconds and usually says “OK” and then you can continue on, pick up your stuff, and you are through security. Twice I have had that piece of paper test as not ok where they then take me and my stuff for a full search and pat down. After that happened, I always make sure I wash my hands before I go through security to be sure there is nothing on them that would set off the alert.
- Pre-Board
- I have heard that you can request pre-board at the gate because of diabetes so that you are on the plane soon enough to ensure there is open bin space by your seat to keep your supplies close. I have never done this, but is an option you could pursue if you feel it will make your travel experience easier.
If you are driving:
- Make frequent stops for exercise and to move around. If you are accustomed to moving throughout the day, sitting stationary for long periods of time will most likely contribute to higher blood sugars. If you are a road trip snacker, activity will also help any persistent highs.
If you are changing time zones:
- If you are changing time zones when you reach your final destination, don’t forget to change the time on your pump so that your basal rates are synced up to your schedule. I have never changed more than 3 time zones in the trips I’ve taken, but I imagine if you are traveling half way around the world where your days and nights are flipped, this could potentially cause some challenges in managing blood sugars until your body adjusts.
- Now this may be a bit controversial, but if I’m changing time zones and it’s only an hour difference, I do not change the time on my pump, especially if my trip is only a few days. My reasoning behind this is that my body is still on the same schedule with my routine still occurring during the same time of day. I don’t think my body realizes the time is different by one hour.
Step 6: Have Fun!
All the preparation you do before you leave will give you the ability to enjoy your time away if traveling for fun or focus on the business at hand if traveling for work because you will have the peace of mind that you are prepared for whatever may come your way. Traveling to new destinations provides the opportunity to make connections with those around you and meet new people who may have diabetes. It never ceases to amaze me that every place I’ve been I always run into another person with diabetes or someone sees my pump and says they have a family member with one of those. While you are gone, don’t expect to have perfect numbers as you are out of routine, but still strive for making good management decisions and don’t neglect taking care of yourself. Getting out of your comfort zone and routine can provide a challenge of learning how to adapt and manage your diabetes in new situations. You can still live life without limitation (including traveling!) while having diabetes, you just have to live with diabetes in mind!

Leave a reply to Trip Review: Jamaica, Ya Mon! – With DiabeTes 1n MinD Cancel reply